Guest Post: 3 Easy Steps for Teachers to Convert iBooks into Video
 We often get asked by teachers how they can share the books they have made using Book Creator for iPad or any other iBooks with people who don’t own an Apple device.
A common example might be to share the work of their students with parents, or on the school’s blog.
Although there are a few workarounds for sharing iBooks, this article explores an excellent way to convert iBooks into video format, which can easily be shared across a number of platforms.
Step 1: Create a screencast of your iPad
A really useful tool for screencasting and recording your iPad is Reflector, and at $12.99 it’s much cheaper than buying Apple TV! (You can even download a free trial version which gives you 10 minutes testing time.)
Reflector is available for Mac and Windows, and we found it pretty simple to get up and running. There are some well presented installation instructions on their site.
You can screencast live but if you want to record your screencast, press CTRL & R (Command & R on a Mac) and the app will start recording. When it’s finished recording, you will see the video file automatically added to your desktop.

Above: A screencast of an iPad onto a Mac desktop (Book: Human Body Systems iBook Project by Mrs. Gallo’s 3rd grade class)
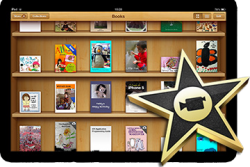
Step 2: Edit the video
Because the file is saved as a .mov file (QuickTime) it’s a simple task to open it in iMovie and edit. You could add an audio commentary, or music if you wish.
Step 3: Share the video
If you’re familiar with iMovie you’ll know you can export the file directly to YouTube or Vimeo, or save the file separately if you prefer. You can then embed the video on your school’s blog for everyone to see, regardless of whether they have an Apple device or not.
Book Creator for iPad was launched in 2011 by Dan Amos, founder of Red Jumper Studio. The app has since gone on to be the No.1 book app in 60 countries, with over 1 million ebooks created so far (most of those in the classroom!).
Book Creator is available on iTunes for $4.99.